Doing Garden Design, part 4: Results Are In

Six years have passed since my garden remodel process started.  They say that it takes at least three years for perennial plantings to begin living their best life. Most of the new plants are in their fifth year, and are now well established.

As with any architectural project, now that it has been realized, I can evaluate how the design meets my original goals, which were to have larger drifts of fewer, more thoughtfully placed, more evergreen, and more drought tolerant plants. I wanted to brighten the shady places. 

Here are some instances which correlate strongly to the goals.

A

“A new “flowery flower” area along the upper path in a sunny stretch is full of color from spring through fall. I added drip irrigation here, which made all the difference for the success of these plants.

B

In the upper left corner, an abelia ‘kaleidoscope’ provides an ever changing show of color. Beyond it, on the far side of the path, a large drift of evergreen germander with late-summer purple flowers has filled in nicely. Beyond it, the new Italian prune plum tree started yielding plums last year!

C

Goatsbeard brightens an area of full shade. One of the three didn’t make it, so it was replaced (in green cage). Wonderful surprise: the hellebore in the left foreground is a volunteer from a nearby clump.

D

A new dwarf hydrangea sparkles at a shady turn of the path. Sweet woodruff forms a carpet underfoot. Spotted lamium adds contrasting foliage.

E

In the formerly neglected upper right corner, three tall prickly mahonias form a backdrop for a row of heavenly bamboos.

Map showing larger new elements of redesigned upper garden.  Letters correspond to photos, above. Compare to schematic design sketch, in Part 2 of this series.

Like all gardens, this one is ever evolving. I am very happy with the changes I initiated six years ago!

All photos by Laura Kraft.

Feel free to share the content of this posting, but please provide a link back to 2H Pencil.

I invite your comments.


Doing Garden Design, part 3: Field Notes

As summer’s yard work draws to a close, I offer the following garden-related “notes-to-self” that have been scribbled in my journal during the season.

IMG_4072

fatsia berries


PLANT CARE

  • Consider and then use the best available tool for any given task.
  • Don’t cut corners in any task, large or small.
  • Learn about the form of root systems of undesirable plants, the better to eliminate them.
  • When pruning, eliminate dead, weak, and crossing shoots/branches. Be mindful that any cut made will determine the leading edge of new growth. Try to visualize the direction the new growth will take. Cut to encourage growth into outward-inclined free space.
  • No two plants can thrive in the same exact location. Choose one. Carefully extract the other. (See item #4, above.)
  • Mulch, and mulch again.

IMG_4095

magnolia, with hardy geranium ground cover


REFINING THE DESIGN

  • Think big, pay attention to tiny details. Be on the lookout for surprises.
  • Allow room for growth.
  • Build into the design some tolerance for chaos. Selectively groom to let in happenstance.
  • Cut losses with too-far-gone plants or schemes.

IMG_4197

giant fern, unfurling


MINDFULNESS

  • Note the cycle of patience punctuated by decisive action.
  • Observe with focus.
  • Stand back regularly, and take the long view.
  • Pace self.
  • Slow down. Patience is a goal.
  • Stop and smell all of it.

IMG_4185

tulip


All photos by Laura Kraft.

Feel free to share the content of this posting, but please provide a link back to 2H Pencil.

I invite your comments.

Doing Garden Design, part 1: Analyze This

(a 4-part series)

1996                                                            2016

A garden constantly changes over time. So, too, does the gardener. And (lately), so does the climate. After 3 decades of tending my lush and ever-bearing yard, it was time to re-think its current design. There was little to limit my imagination except the limits of my physical ability and my time.

I approached the design similarly to the way I approach any architectural design project, with a progression of phases.

Phase 1. Identify Problems in Need of Solutions:

  • Some beds have become grass-and-weed-choked beyond repair.

this path (L) has become tangled up (R)


  • The shade from established trees has expanded.
  • I have gotten more measured in my energy expenditure as I age, and need to dial down the amount of high-maintenance plants.
  • The summers have gotten hotter and drier; some plants now wither where they used to flourish.

2015-08-29-14-38-43-hdr

this slope became too dry and shady for its plantings


Phase 2. Gather Facts About Prevailing Conditions.

Over the years, I have developed a head full of experience and opinions about this garden’s performance.

The hardscape (paths, stairs, retaining walls, and paved areas) has been developed over the years. It will essentially remain as-is.

I have noted plantings that have succeeded and those that failed. Some of them combine with others. Some are easy to care for. Some offer great rewards, such as long blooming time, delicious scents, beautiful colors, and/or striking textures.

On the other hand, others are short-lived, invasive, fussy, too chaotic, or I just don’t like them.

I made the following double-duty diagram.

new-plantings-exposure-1

sun/shade exposure        /        existing features, to remain


Examples of elements well worth keeping as-is:

rhodies

enormous old rhododendrons with 70’ tall Western Red Cedar beyond

grove

native ground covers within the rhododendron grove

flower-garden

sunny flower garden near house


Phase 3. Scheme, daydream, and imagine possibilities. Start wish lists, accompanied by deep research in books and on the web. Some of my lists:

  • Flowers I want.
  • Drought-resistant shrubs with “winter interest.”
  • Plants that will bring sparkle to the shade.
  • Plants (from small-to-large) with remarkable foliage.
  • Scented plants to locate near the path.
  • Evergreen ground covers, bedding plants, and specimens.
  • Plants with notable shapes.
  • And so on…

wish-list

I love the evocative names, and all of the promises they hold

At the end of this third phase, armed with information and ideas, I am ready to start drawing.

The next 2H Pencil post will be:

Doing Garden Design, Part 2: Plans

upper-plan-rendering_edited-1

Feel free to share the content of this posting, but please provide a link back to 2H Pencil.

I invite your comments.

Save

Save

Untrue Colors

I’ve been going through the slides from my family’s past to figure out what to do with them and how to do it. My Dad was a diligent photographer, shooting quantities of slides, stills, and movies.  When I was a child, he had a darkroom for black and white processing.  I spent many hours in there with him and later, on my own. I remember well: “When the little red light by the entrance is on, don’t go in!” In the process of reviewing the slides, I am enjoying the opportunity to see the world through my Dad’s eyes– what interested him, what he focused on, what he thought was significant.

slidesWe’ve got a lot of slides.

My task is to cull the images that I think will be of significance to current and future generations, and to discard the others. Each slide will be considered in these terms.  The “keepers” will be digitized and stored on a dedicated portable drive, and then opened on my graphic design software, where I can quickly rotate, crop, and adjust the color, contrast, and/or brightness of each. I’ll figure out a way to present a streamlined version of the best images for my family members.  It’s a big job; I expect it to take a couple of years.

The batch I have been working with tonight are of a trip my parents took to Turkey in 1973. The 40-year-old slides have undergone some physical changes over time (haven’t we all!), and their color is uniformly distorted. I can correct the color when there are people in the shot.  However, in this batch of slides, most of the images are of scenery, buildings, and ruins. I’ve got no reference point about the “real” color except the software’s auto correct semblance of the actual colors, which is only a computer code-driven guess.

In their unretouched form, the color distortion makes the scenes surreal and compelling, perhaps even more so than what is “correct” or “true.”  It adds additional other worldliness to a world that is already “other” to me.

20The slide’s age turned the mosque this luminous purple.

maxfield-parrish-daybreak-78398
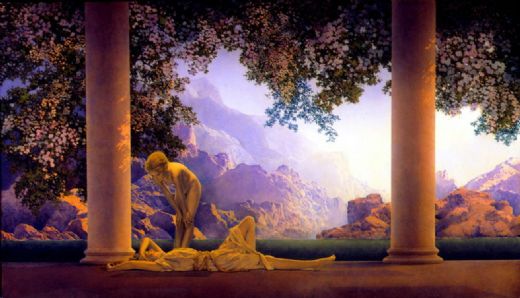
The colors and the atmosphere in the mosque image are not so different from those above in “Daybreak,” by painter/illustrator Maxfield Parrish in 1922.

4
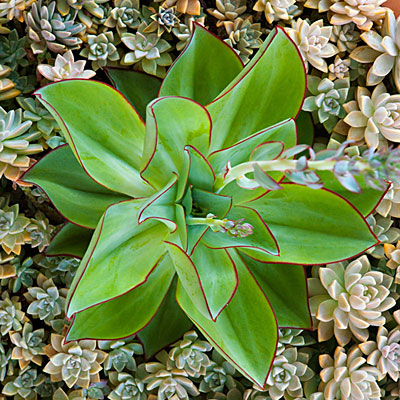
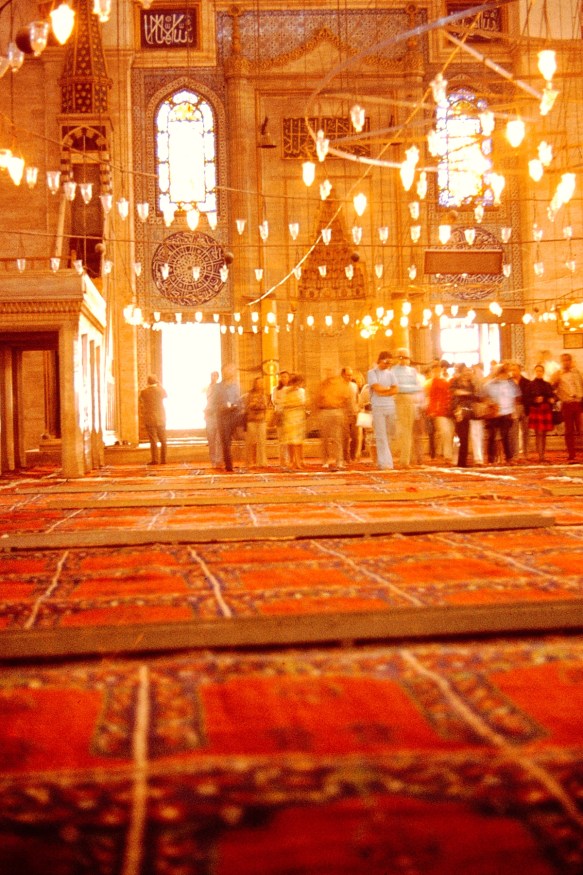
Unretouched, exceptionally vibrant and emphatically colored shot, taken from a position seated on the floor.

3
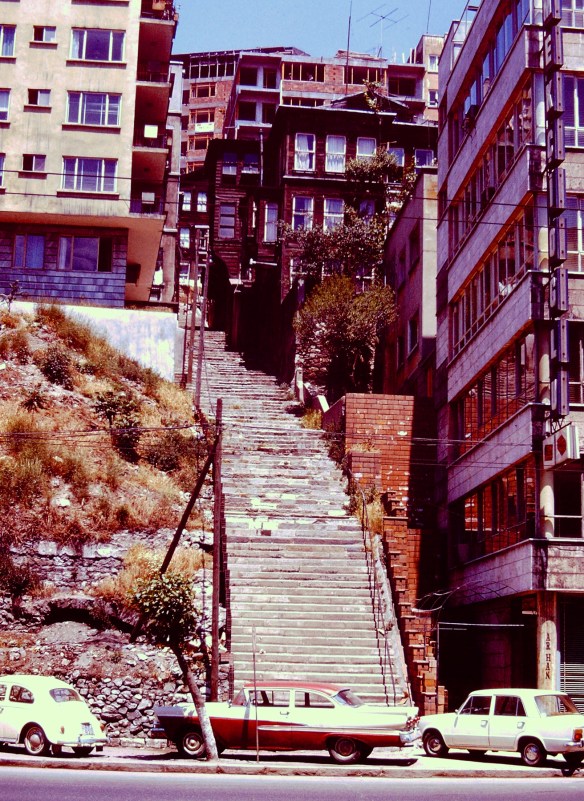
Cool car, interesting loose urban density, some expected colors, and some weird colors.

1cUnretouched image inside mosque.

1dColor adjusted to what might be “real.”

 1bColor correction by software to remove red cast of original.

1a
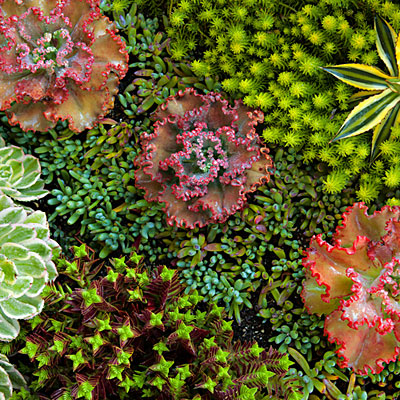
Manipulated, and starting to look like a textile.3aThis unretouched image of a ruin in an arid landscape is, in fact, upside down.

7
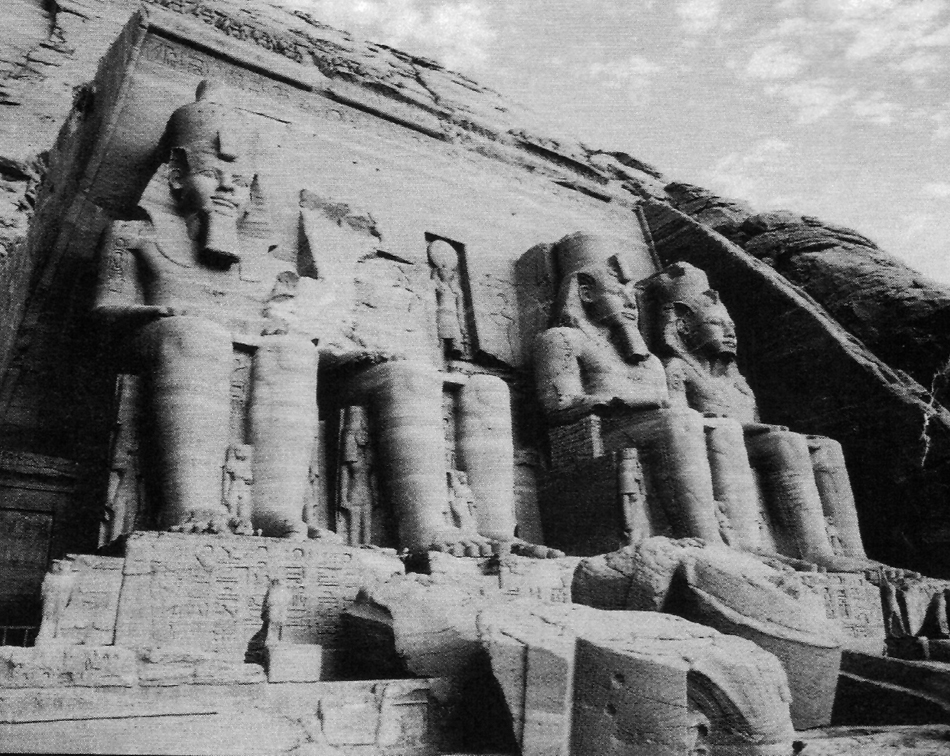
Unretouched image of ruins, looking like a parched otherworldly landscape at sunset. the color palette reminds me of Pre-Raphaelite paintings like this one (I’ve only seen the reproduction, not the actual thing), in which color is used to evoke physical and emotional feelings:640px-John_Everett_Millais_-_Chill_OctoberJohn Everett Millais, Chill October, 1870

PICT0006
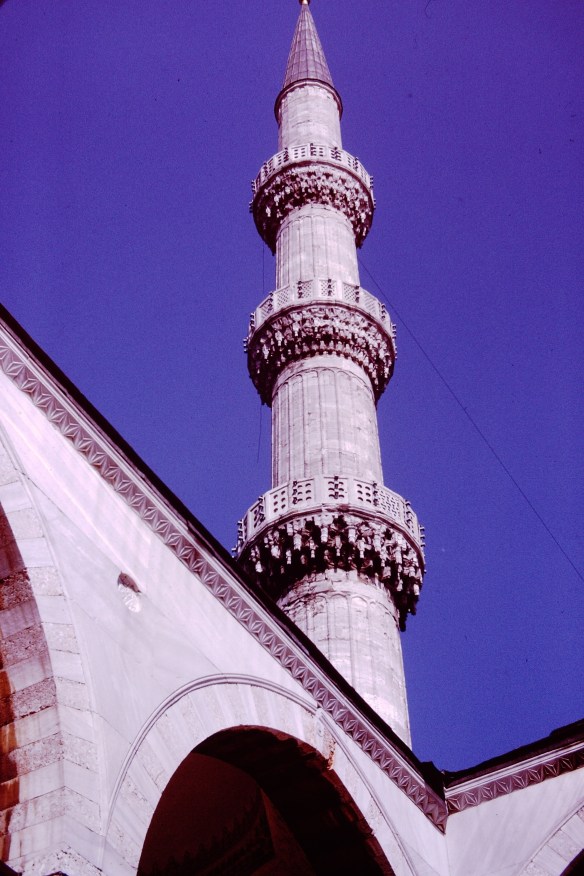
Unretouched composition, with the base of a gold finial touching the frame at the top. Dad sometimes framed his shots with the tops of people’s heads or tops of buildings cut off, but in this case, it makes a great composition.  The negative space of the blue sky is lovely to me.

All Images courtesy of Alan Kraft, with interventions by me.

Feel free to share any of these images, but please provide a link back to 2H Pencil.

I invite your comments.

Geomimicry

“…history tells us the art and architecture of ancient Egypt are creations from the mind of man; the desert tells us they are translations from the language of the landscape.”

 egypt 1

 Sahara Desert Rock Formation

egypt 2The Sphinx at Giza

egypt 3

Theban Hills, West Bank, Luxor Hills

egypt 4Temple of Ramses II, Abu Simbel

Photos and quote from Architecture Magazine, circa 1998.

Feel free to share the content of this blog, but please provide a link back to 2H Pencil.

I invite your comments.

Illusions, No. 1

This California garden looks like the sea floor.  The plants look like sea-dwelling creatures and plants. The imagination swims!

Beachside succulent garden; Sep'12; "underwater" plants

Beachside succulent garden; Sep'12; Tide pool beach garden n Corona Del MarSucculents expert and horticulturist Joe Stead says, “As a kid, I explored tide pools …I marveled at the starfish and sea anemones. I wanted to bring that sense of wonder to this garden.”

With great knowledge and skill, he has selected and arranged boldly colored, drought-tolerant plants to create charming and compelling illusions.

Beachside succulent garden; Sep'12; Tide Pool Beach Garden n Corona Del Mar, CA    The “sea anemones” are agaves, nestled among red mangaves.

Beachside succulent garden; Sep'12; Tide pool beach garden n Corona Del Mar  The “starfish” is Echeveria subrigida.

Beachside succulent garden; Sep'12; "underwater" plantsThe “kelp” is Senecio vitalis.

All photos courtesy of Bret Gum; written content is derived from the article “How to create a sea-creature succulent garden,” written by Debra Lee Baldwin, in Sunset Magazine.

Feel free to share the content of this blog, but please provide a link back to 2H Pencil.

I invite your comments.